Do you sometimes have a colour image that appears washed out, lifeless and overly gray, even after adjusting levels and contrast? You know there is more colour in the image, but you can’t seem to coax it out.
Well, if you’re up for a short ride through the Lab colour mode, here’s a very simple trick to “pump up the colour”.
The trick is to adjust the colour contrast in the Lab colour mode, then switch back to RGB. Here’s how it works in Photoshop CS4, but it should work pretty much the same in any application that supports the Lab colour mode.
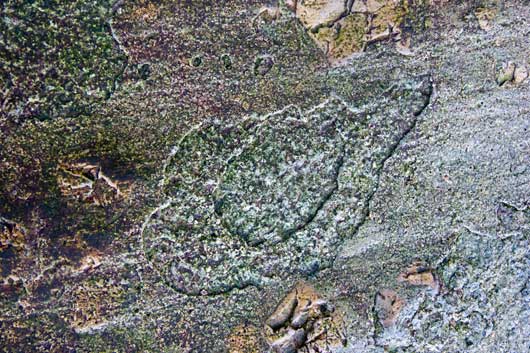
1. Open your image and do your basic levels and contrast adjustments. I’m assuming your image is in the normal RGB colour mode at this point. You can confirm this with “Image > Mode” and see that “RGB Color” is checked.
Here is my example:
2. Now click “Image > Mode” and check “Lab Color”. This will change the colour mode to Lab. You won’t see any change in the image at this point.
3. Now click “Layer > New Adjustment Layer > Curves” to create a curves adjustment layer. Since you’re in Lab colour mode, you won’t have the usual “RGB”, “Red”, “Green” and “Blue” channels to work with. Instead, you will have “Lightness”, “a” and “b”.
It is the “a” and “b” channels we’re interested in. The “a” channel controls “Green-Magenta” colouring and the “b” channel controls “Blue – Yellow” colouring.
4. Select the “a” channel. You will see that the histogram is bunched up in the middle indicating low colour contrast in green and magenta.
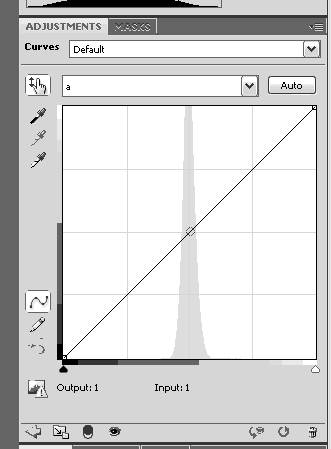
5. Click and drag the end points of the adjustment curve towards the middle. This will steepen the line and increase the colour contrast in green and magenta. Try to keep the middle point in the middle so that the neutral colours won’t be affected. You probably don’t need to move these points very far to get a dramatic change.

6. Do the same in the “b” channel. You might need to go back and forth a few times, tweaking the “a” and “b” channels, to get the result you want.
7. When you’re happy, click “Image > Mode” and check “RGB Color”. In the dialog box that appears, be sure to choose “Flatten”, so that your adjustment layer is applied before the colour mode is changed back to RGB.
In my example above, I have exaggerated the steepness of the curves to demonstrate the principle. Here is the resulting image:
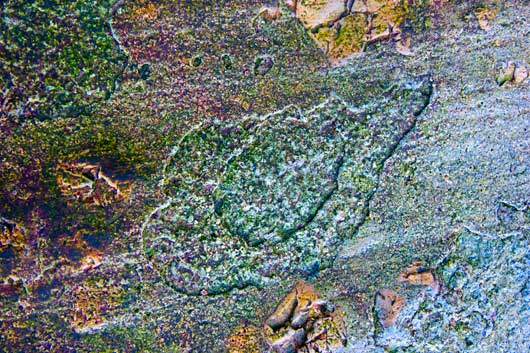
You can see that even in the gray areas, there was a lot of residual colour that Lab mode was able to reveal.
Cheers!
Brad
P.S. “Lab”, like “RGB”, is pronounced as 3 separate letters.
I appreciate the kind comments, louboutin. I think a RSS 2.0 feed is already available. I see the link immediately above. Would that work?
Cheers!
Brad