In part 1 of this series, I answered the very important question “How many pixels do you need?” to get the best prints at Turning Point Arts. In that article, I explained why it is unnecessary, and in fact undesirable, to resize or up-sample your image before submitting it to me for printing. This leads to the question of how best to sharpen your image if you plan to have it printed at Turning Point Arts.
Sharpening is required at two places in the workflow: the first place is “capture sharpening” (or “creative sharpening”); the second place is “print sharpening”. You do the capture sharpening (at 100% view) and I do the print sharpening.
Capture/creative sharpening. Every digital photo requires some amount of sharpening, if only to correct the colour blurring that occurs when the camera processes the sensor data to produce the image (learn more about this). This sharpening is actually done in the camera to produce a JPEG file or it is done in the computer when you open a RAW file. Sometimes extra sharpening is needed.
Also, some sharpening might be required to correct a focus problem or otherwise enhance the detail in an image. This “capture” or “creative” sharpening is something that you do to improve the look or quality of your image as seen on your monitor. If any capture/creative sharpening is needed, you must do it before submitting the file for printing ().
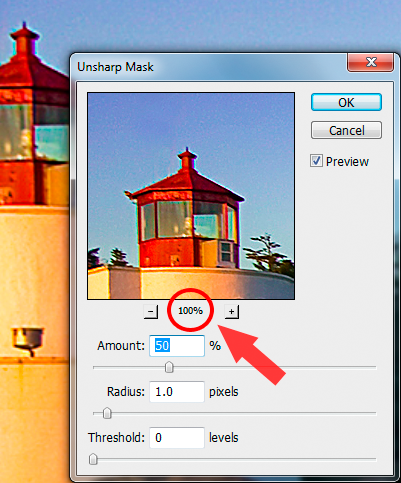
Regardless of how many pixels you have in your image, the key thing about successful capture/creative sharpening is to evaluate it while viewing the image at 100%. In other words, set your view so that 1 pixel of your image occupies 1 pixel on your monitor. Apply only the least amount of sharpening that produces the best result when viewed at 100%. In Photoshop and Photoshop Elements, the command is “View > Actual Pixels” (keyboard shortcut: Ctrl/Command+1).
![]()
You can also set the zoom to 100% in the various sharpening tools as you’re doing the sharpening.

Print sharpening. Print sharpening is needed to match the fine detail of an image to the final print resolution after up-sampling (learn more about this). Since you’re not resampling the image before submitting it to Turning Point Arts, you actually cannot do the print sharpening beforehand. But not to worry–I do it for you. Our print software (Qimage Ultimate) is specifically engineered to properly sharpen the details in your image when it is printed based on the print settings I use. So as long as you’re satisfied with your capture/creative sharpening when viewed at 100% on your monitor, Qimage will optimally sharpen the image when I print it.
And that’s all there is to it!
Next time: Why Facebook images “don’t work”


1 Comment